Effects Menu
The Effects menu can be found in the Asset Editor, next to the Text Overlays and Graphics Overlays.


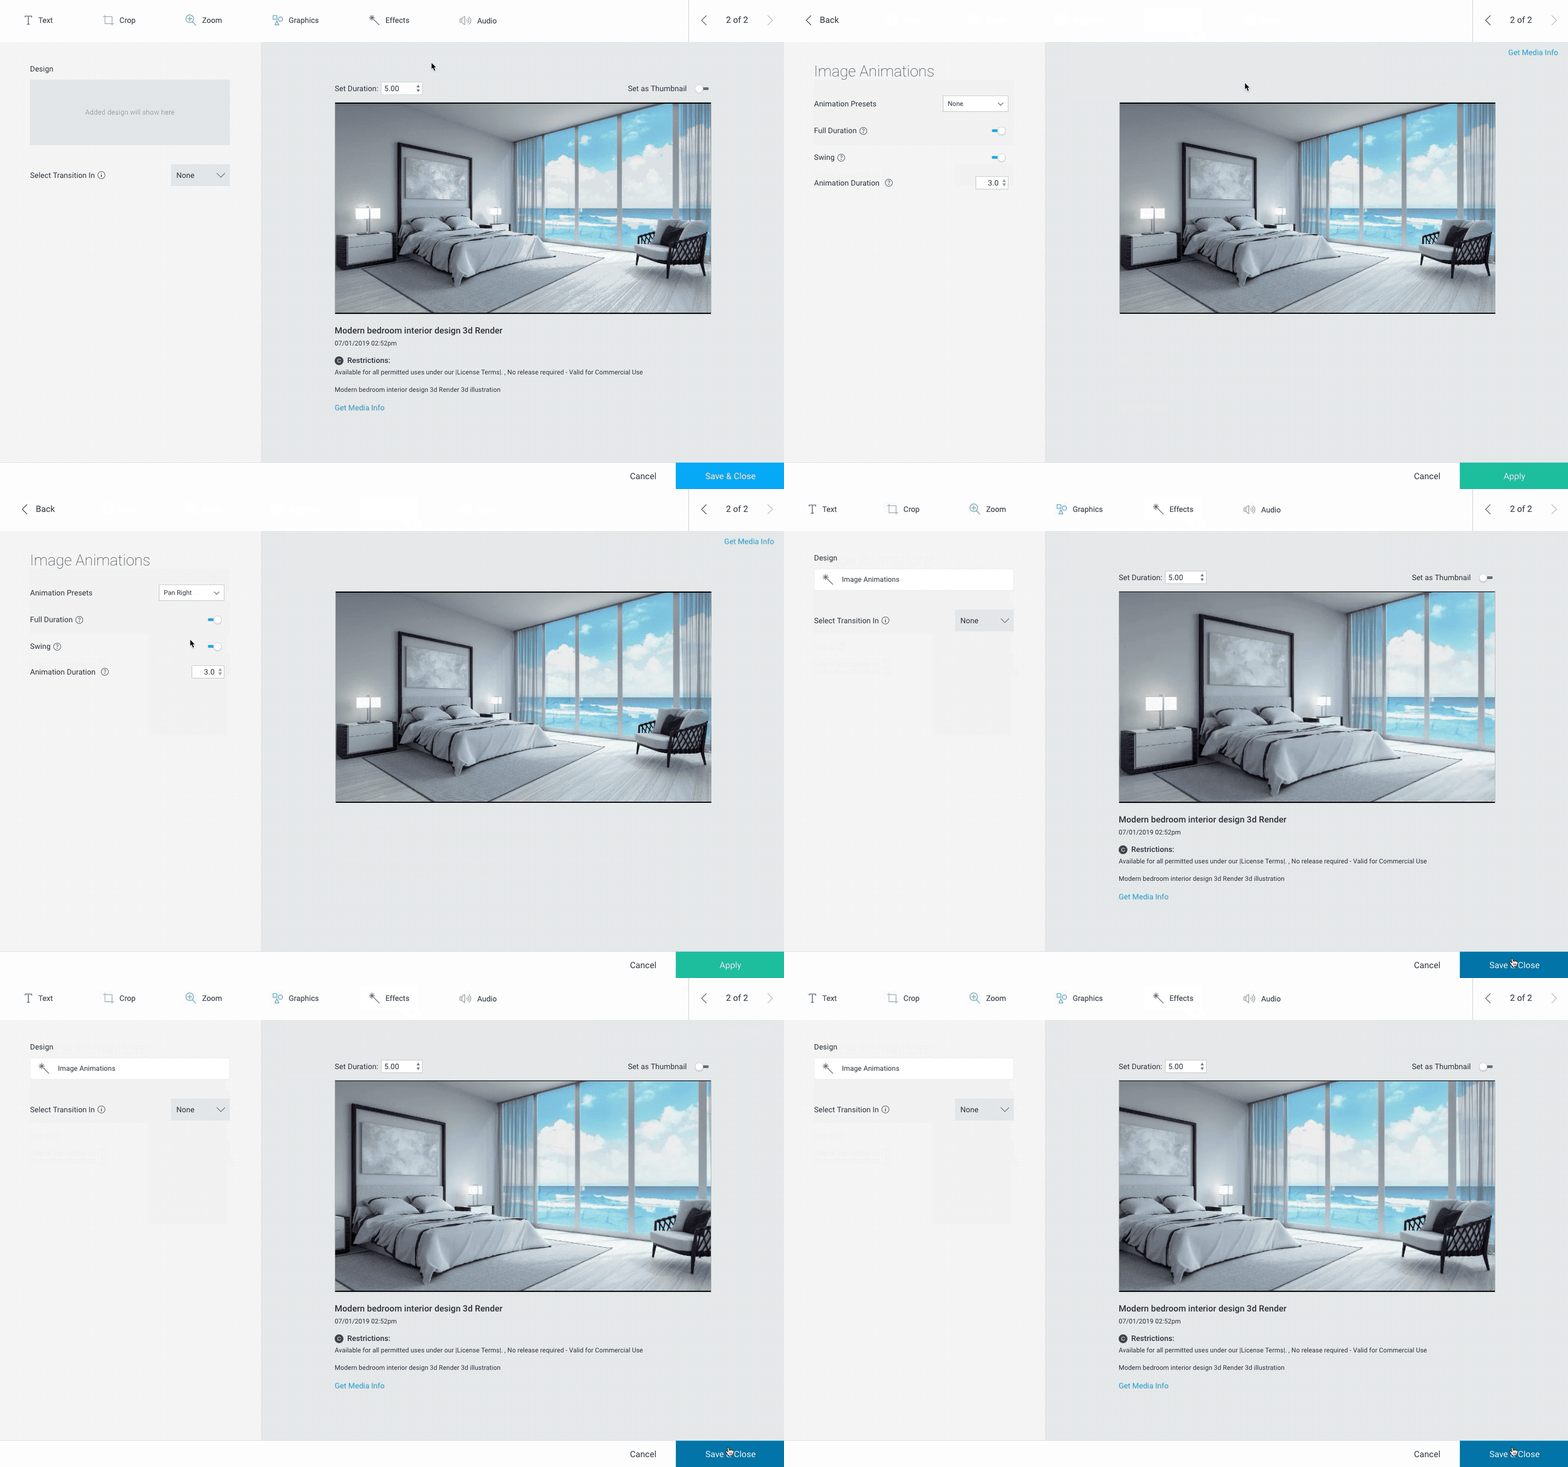
- Open the image on the Timeline using the pencil icon
- Click on the Effects option on the top menu
- Then click on Image Animation
- On the Left side, under Input Fields select the Animation Preset you would like to use
- Select Full Duration if you would like the animation to occur the entire time the image is on the Timeline
- If Swing is selected: The animation will swing if the asset duration is longer than the animation duration
- If Full Duration is not selected, you can adjust the time that the animation occurs by adjusting the Animation Duration field (in seconds)
- Hit Apply to preview the new look
- Then click Save & Close to return to the Timeline

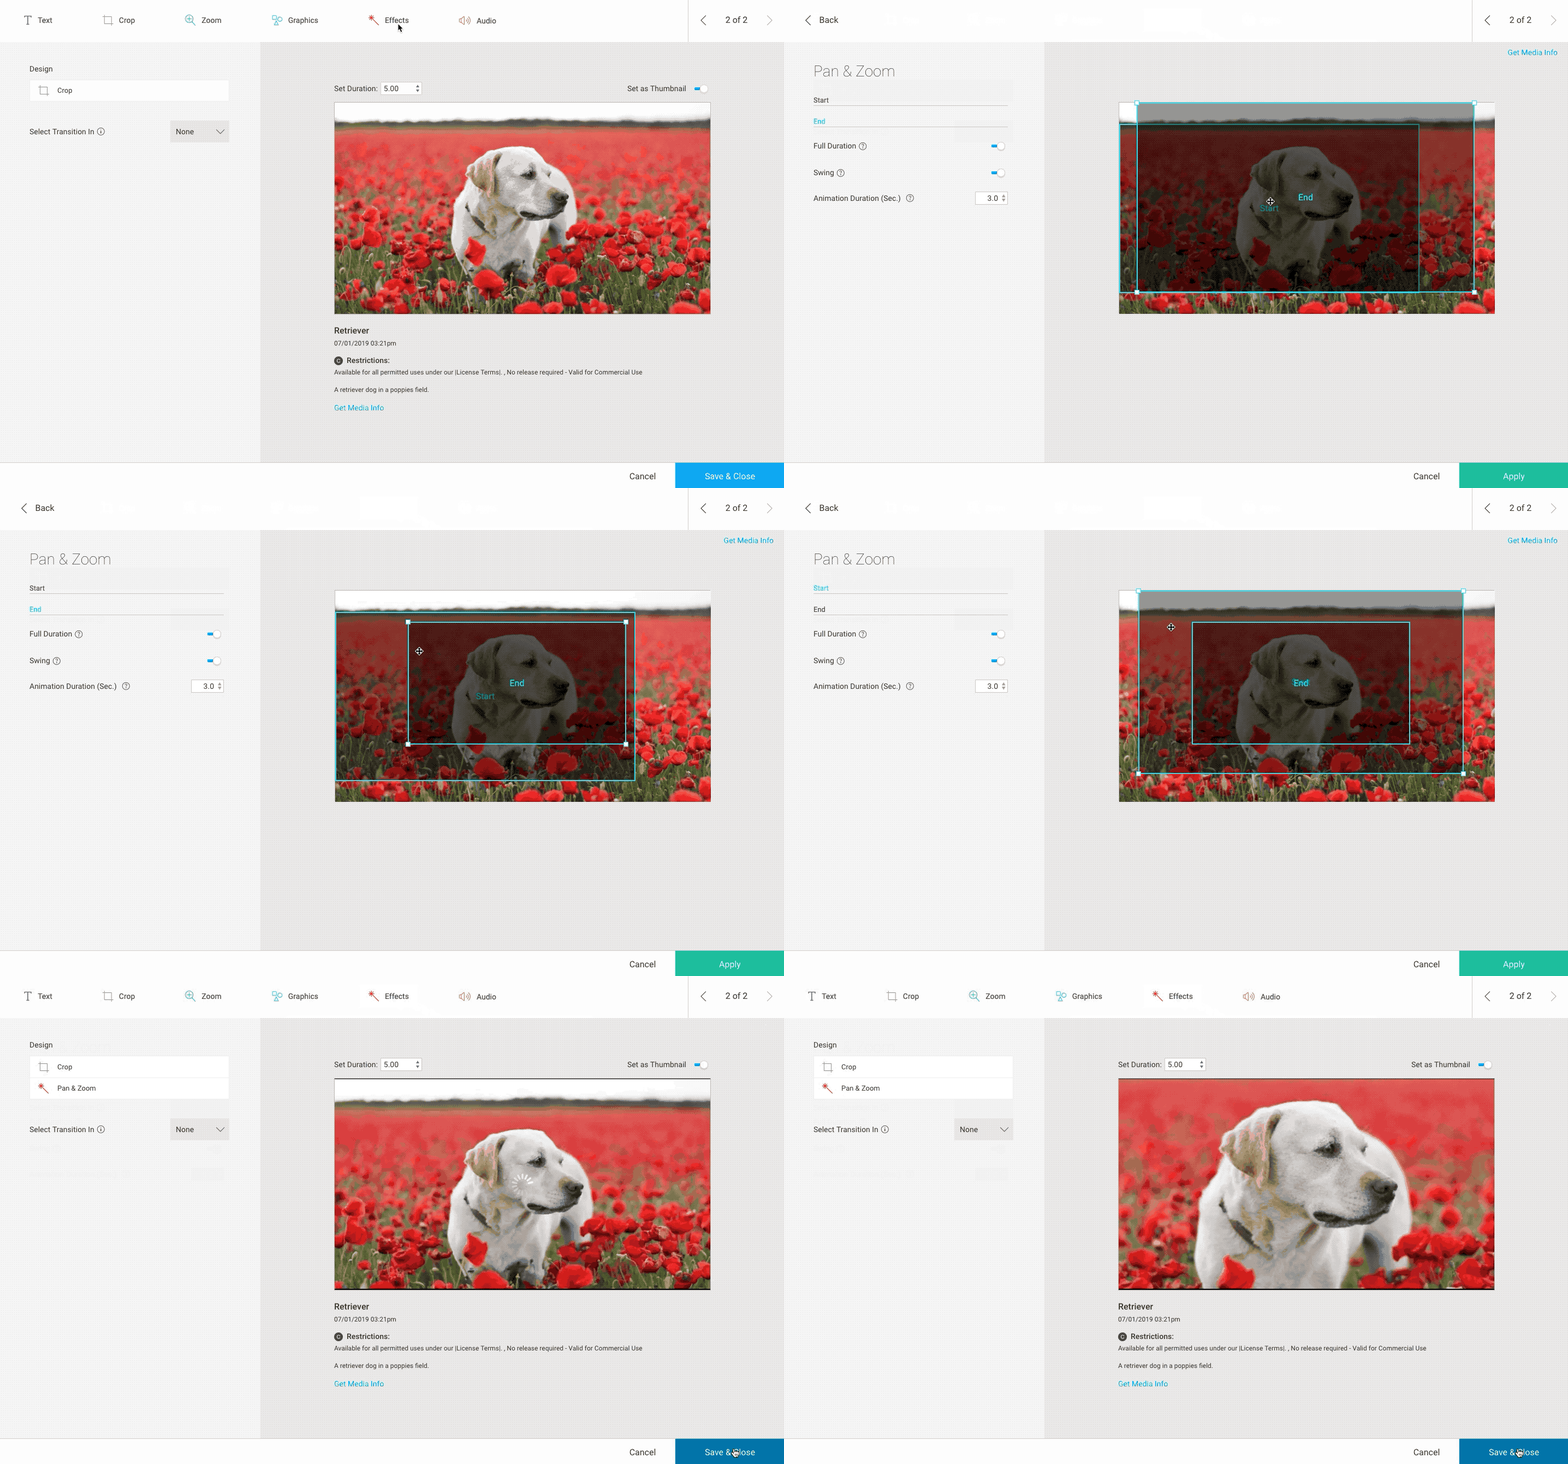
- Open the image on the Timeline using the pencil icon
- Click on the Effects option on the top menu
- Click on the Pan & Zoom option
- By default you will see two rectangles on the image marked Start and End, to move the placement of the start or end point, click on one of the rectangles and drag it to the desired position.
- To zoom in, you need to resize the rectangle to the desired point on the image. Click on one of the rectangles and then click and drag on the corner handles that appear to resize the box.
- Select Full Duration if you would like the animation to occur the entire time the image is on the Timeline
- If Swing is selected: The animation will swing if the asset duration is longer than the animation duration
- If Full Duration is not selected, you can adjust the time that the animation occurs by adjusting the Animation Duration field (in seconds)
- Hit Apply to preview
- Then click Save & Close to return to the Timeline

Wochit allows you to Blur out objects in an image or video using the Blur tool. You can adjust the size and the position of the blur and the rate of pixilation from 1 – 100 to get your desired effect. This is a great way to censor an object, or person in your video in addition to giving you another option as a background for your free text.
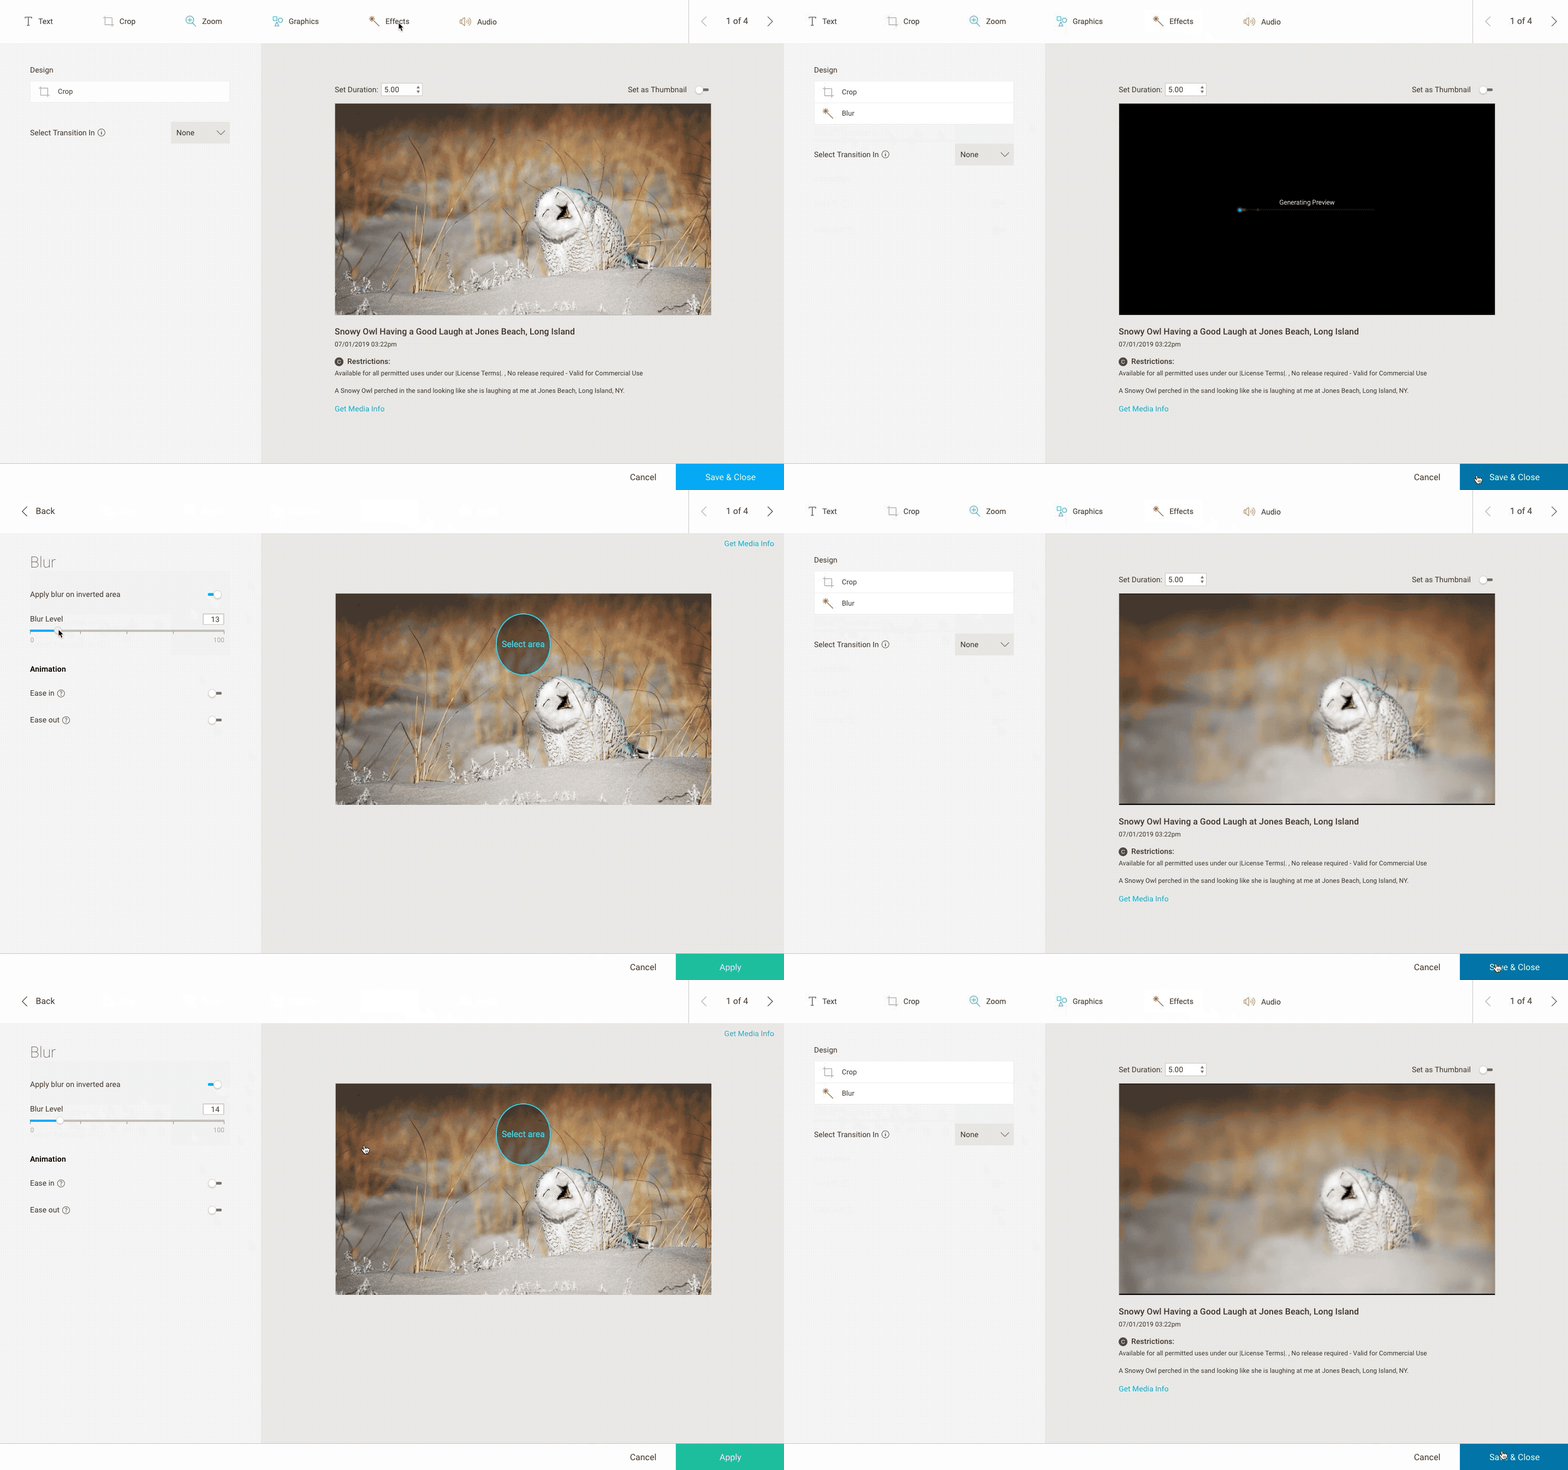
To use:
- Open the image on the Timeline using the pencil icon
- Click on the Effects option on the top menu
- Then click on Blur
- Once opened, you will see a ‘Select area’ circle appear on your asset, click and drag the object to move it to the area you’d like to blur
- Click on the white points surrounding the Area to adjust the size of the blur, with the ability to increase the circumference of the circle or stretch it into an ellipse
- On the Left pane of the asset, you can adjust the Blur Level of the area from 1-100 to achieve your desired effect
- Hit Apply to preview the new look
- Then click Save & Close to return to the Timeline
Other options for the blur tool include:
- the ability to invert your selected area, so instead of the selected area being blurred out, the rest of the image will be.
- The option to ease in or out of the blur to provide a smoother transition onto the asset.
Image Filters

With 15+ filters, you can change the look and feel of your whole video with just a few simple steps.
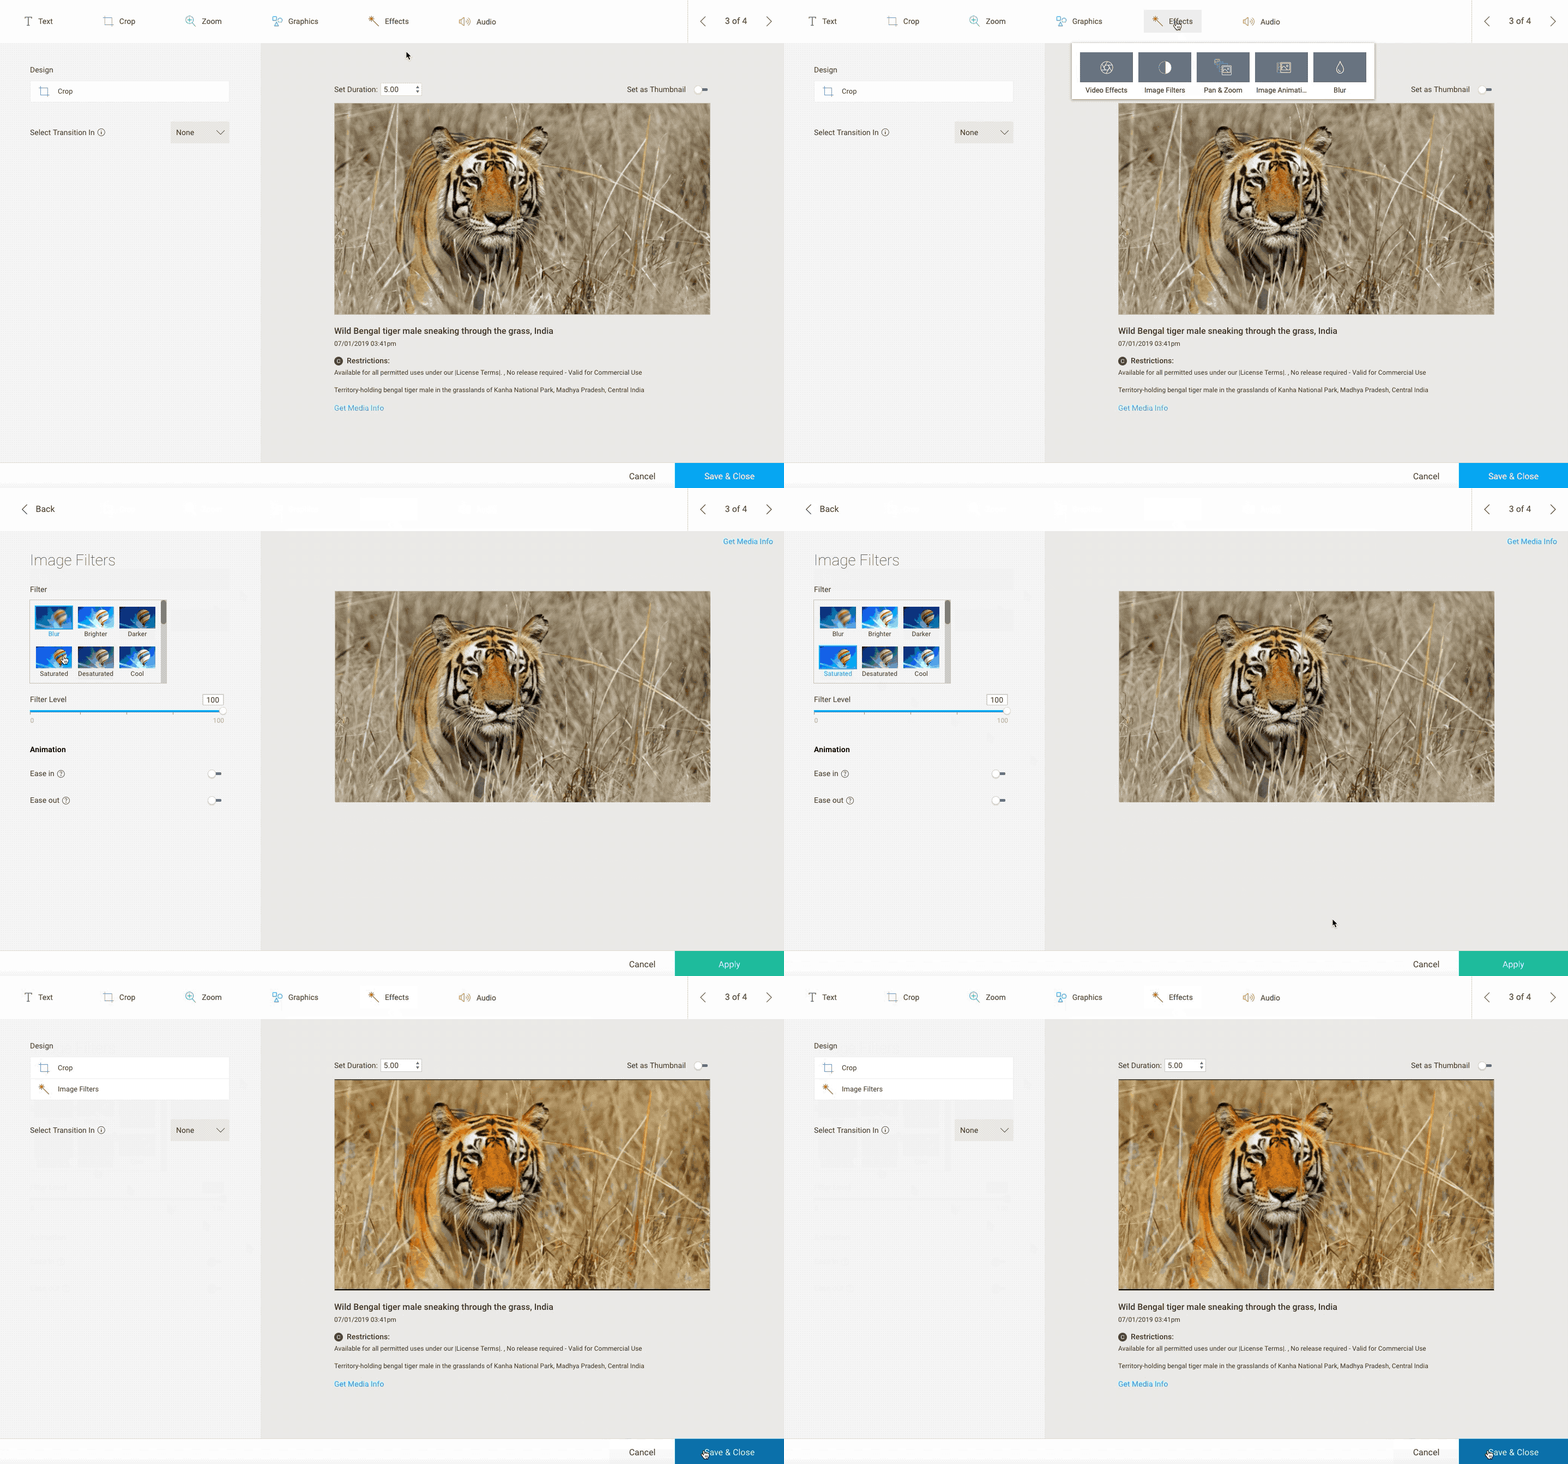
- Drag the image from the Lightbox to the Timeline
- Open the image preview by clicking on the edit pencil
- Select the Effects button from the top menu
- Select Image Filter
- Select the filter you want to use and the level of the filter from 1-100 to achieve your desired effect.
- Hit Apply to preview
- Click Save & Close to return to the Timeline
Video Effects

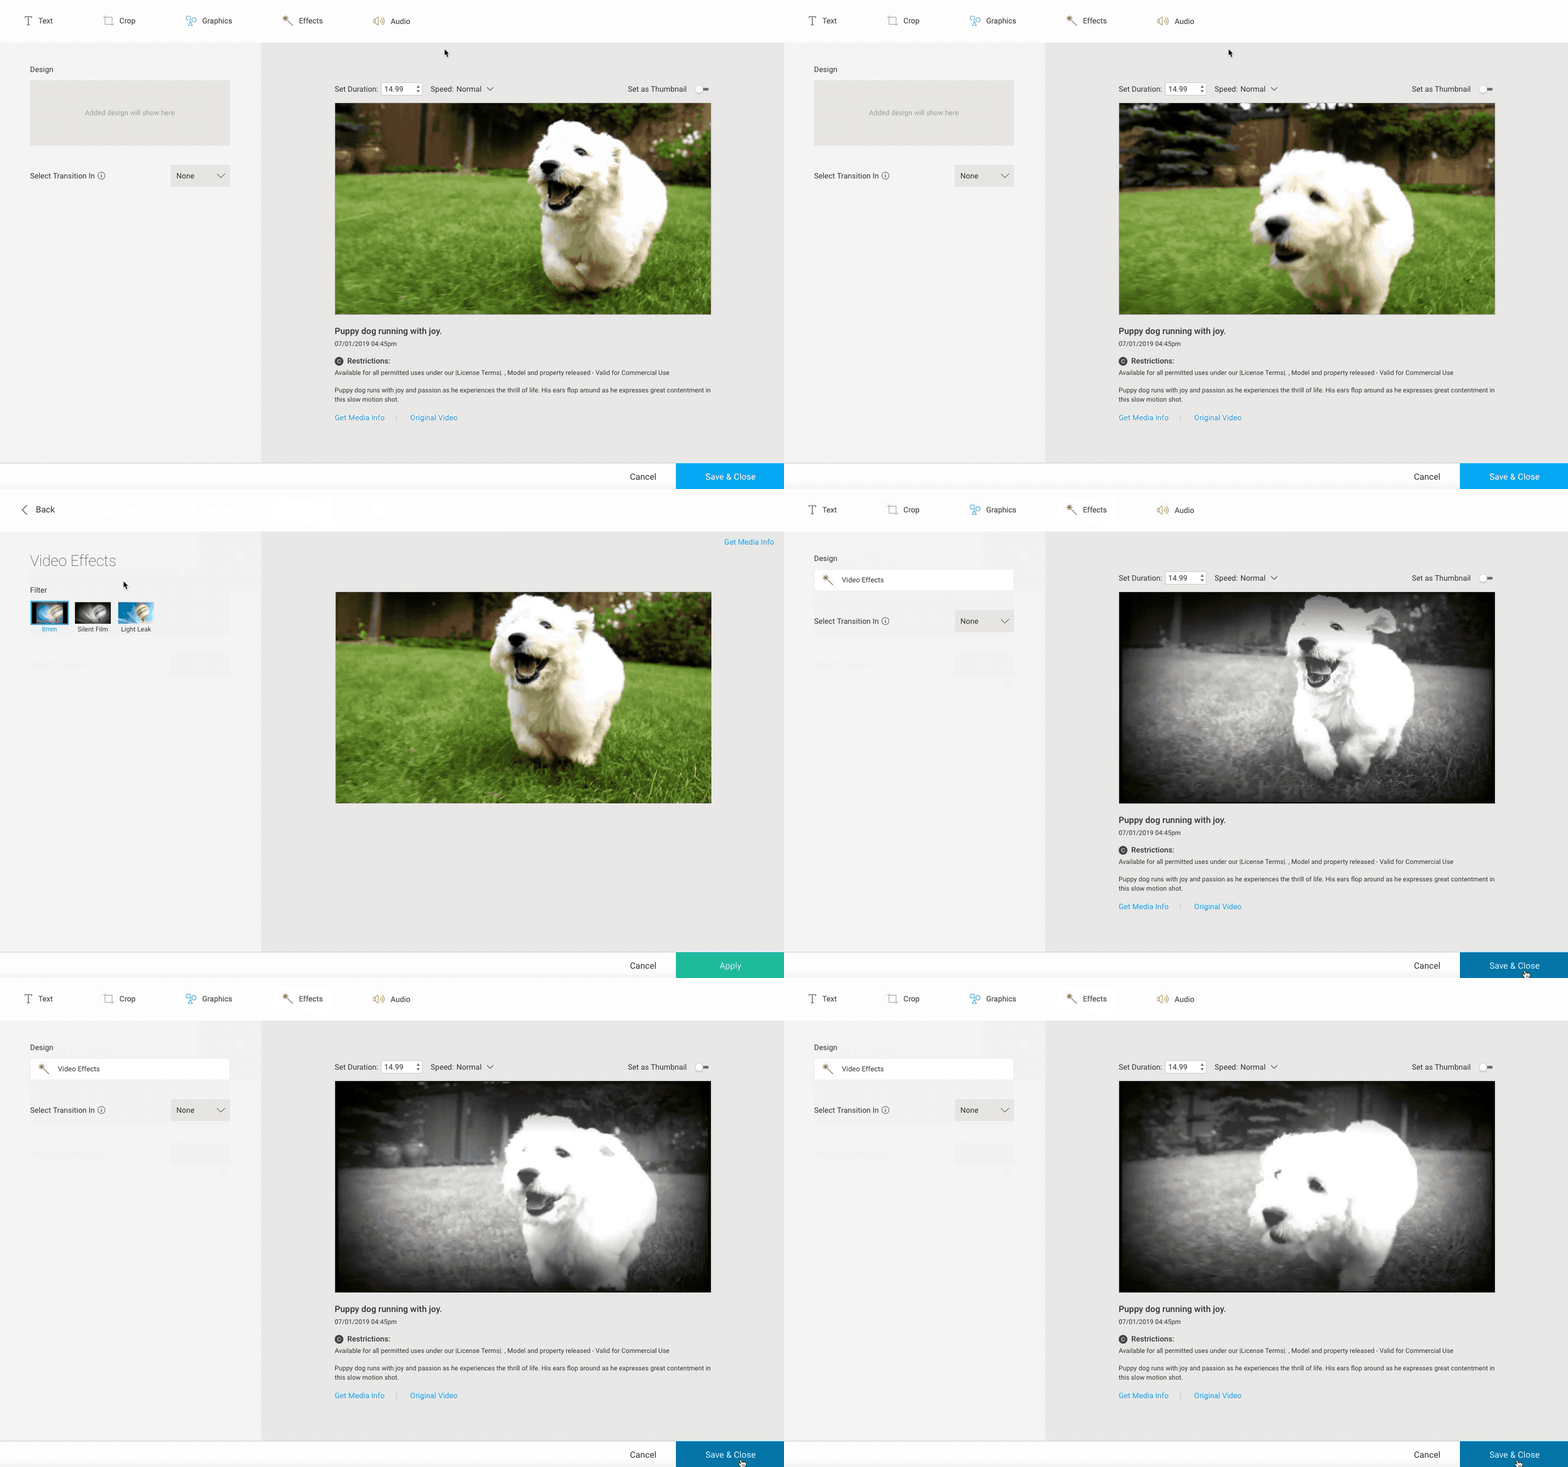
- Drag the Video from the Lightbox to the Timeline
- Open the video preview by clicking on the Edit Pencil
- Select the Effects button from the top menu
- Select Video Effects
- Select the filter you want to use
- Hit Apply to preview
- Click Save & Close to return to the Timeline
Let’s get started
EXCELLENT! THANKS.
Watch your inbox (and spam folder, just in case).
We look forward to connecting with you soon.
Schedule a demo
EXCELLENT! THANKS.
Watch your inbox (and spam folder, just in case).
We look forward to connecting with you soon.